

Set up TraxPoint the right way.
Follow the recommended setup order so your Inventory, Recipes, Catering, costs, and Product Mix data connect correctly from the start.
Set up one location at a time.
Confirm the selected location before entering or importing data. Finish and review each stage before moving to the next.
Choose your setup method
Your TraxPoint setup roadmap
Later records depend on information created earlier. Build the foundation first, then connect the operational layers.
Inventory creates the cost and unit foundation used by Prep Items, Recipes, Catering, and PMIX calculations.
Build your Inventory foundation
Add every purchased item with the correct SKU, unit, cost, stock information, and location before building Recipes or Catering.
Manual Inventory Setup
- Open Inventory and select the correct location.
- Choose Add Item.
- Enter item name, brand, SKU, category, and primary unit.
- Enter Current Stock, Par Level, Reorder Point, and Cost Per Unit.
- Add case, pack, supplier, storage, and barcode details when available.
- Save the item and confirm it appears in the selected location.
Inventory Spreadsheet Upload
- Download the Inventory template from Settings → Import Templates or Inventory → Bulk Upload.
- Complete one row for each Inventory item.
- Use a unique SKU and the correct TraxPoint location on every row.
- Upload the file and carefully review the preview.
- Correct rejected rows before confirming the import.
- After import, search several SKUs and verify units, costs, and stock levels.
If the primary unit is lb, enter the cost per lb — not the cost of the entire case.
Confirm the correct location, required fields, unique SKUs, reasonable units and costs, and an import preview with no unresolved errors.
Connect ingredients, yields, and menu costs
Prep Items represent batches made in-house. Recipes represent finished products, menu items, modifiers, combos, retail items, seasonal items, and other products you sell or track.
Create a Prep Item
- Open Recipes and choose to add a Prep Item.
- Enter a unique Prep Item Code, name, category, description, batch yield, yield unit, and prep time.
- Save the Prep Item.
- Add Inventory, Recipe, or Prep Item ingredients.
- Enter the quantity and unit used for every ingredient.
- Review batch cost and cost per yield unit.
Create a Recipe
- Open Recipes and choose Add Recipe.
- Enter a unique Recipe Code, name, category, portions, selling price, and prep time.
- Choose the Recipe Type that best describes the item.
- Add Inventory, Prep Item, or Recipe ingredients with the correct quantity and unit.
- Save and review calculated Recipe cost and cost per portion.
The batch yield controls cost per usable unit. Ingredient units must also be compatible with the Inventory or Prep Item they use.
Build Catering after your core Recipes
Catering Items can connect to Inventory, Prep Items, and Recipes so TraxPoint can calculate cost, serving quantities, and Inventory requirements.
Create a Catering Menu Item
- Open Catering and choose Add Catering Item.
- Enter a unique code, name, category, description, serving quantity, selling price, and prep time.
- Assign a location when location-specific, or leave it company-wide when appropriate.
- Add Inventory, Prep Item, or Recipe components.
- Review calculated cost and cost per serving.
- Save and confirm the item appears in the Catering menu.
Spreadsheet upload order
- Upload Catering Menu Items.
- Confirm every item was created successfully.
- Upload Catering Components.
- Open several items and verify component quantities and calculated costs.
Fulfillment can deduct connected Inventory based on Catering components and Recipe quantities.
Import PMIX after Recipes and Catering are ready
Product Mix connects sales activity to TraxPoint items for usage insights, mappings, and depletion forecasting. User-role access also applies.
| Column | Required | Use |
|---|---|---|
| Date | Yes | Sale date in MM/DD/YYYY or YYYY-MM-DD format. |
| Product Name | Yes | Product name from the POS or sales report. |
| Quantity Sold | Yes | Number of units sold. |
| Revenue | No | Revenue for the product and date. |
| Category | No | Menu or POS category. |
| Location | No | Location name or code for multi-location accounts. |
Prepare and import
- Use the PMIX template or an approved POS export.
- Confirm dates and quantities are valid.
- Include location when working with multiple locations.
- Open Product Mix / PMIX Sales Sync.
- Import or paste the sales rows.
- Open Mappings and review the results.
Understand mappings
- Auto-matched: TraxPoint found a likely item.
- Manual: A user selected the correct item.
- Unmatched: The product still needs review.
- Ignored: The product should not affect usage.
Product names must be connected to the correct TraxPoint Recipe or Catering Item before ingredient usage and forecasting are relied upon.
Give each team member the right access
The company plan controls which features are available. The individual user role controls what a team member can do inside them.
Owner / Admin
Broad company and operational oversight with setup and management responsibilities.
District / General Manager
Management access for assigned locations and appropriate operational tasks.
AGM
Supports day-to-day Inventory, usage, supplier, and reporting responsibilities.
Choose the lowest role that still allows each person to perform their job, assign only the locations they need, and avoid sharing one login among multiple team members.
Add TraxPoint to your iPhone
TraxPoint can be opened from your iPhone Home Screen for quick, app-like access. Follow the iPhone walkthrough below.
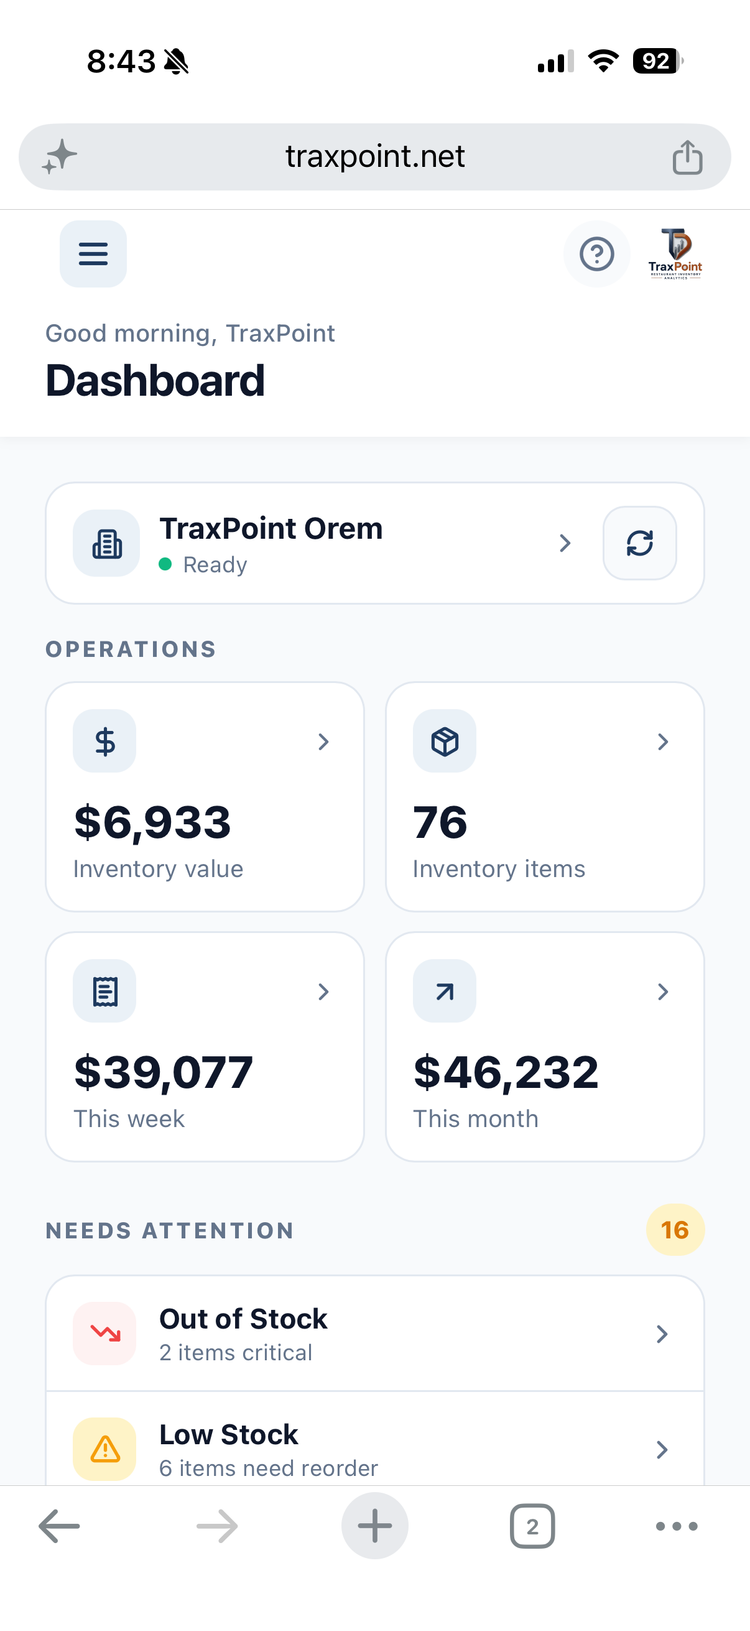
Open TraxPoint
Open TraxPoint in Safari on your iPhone.
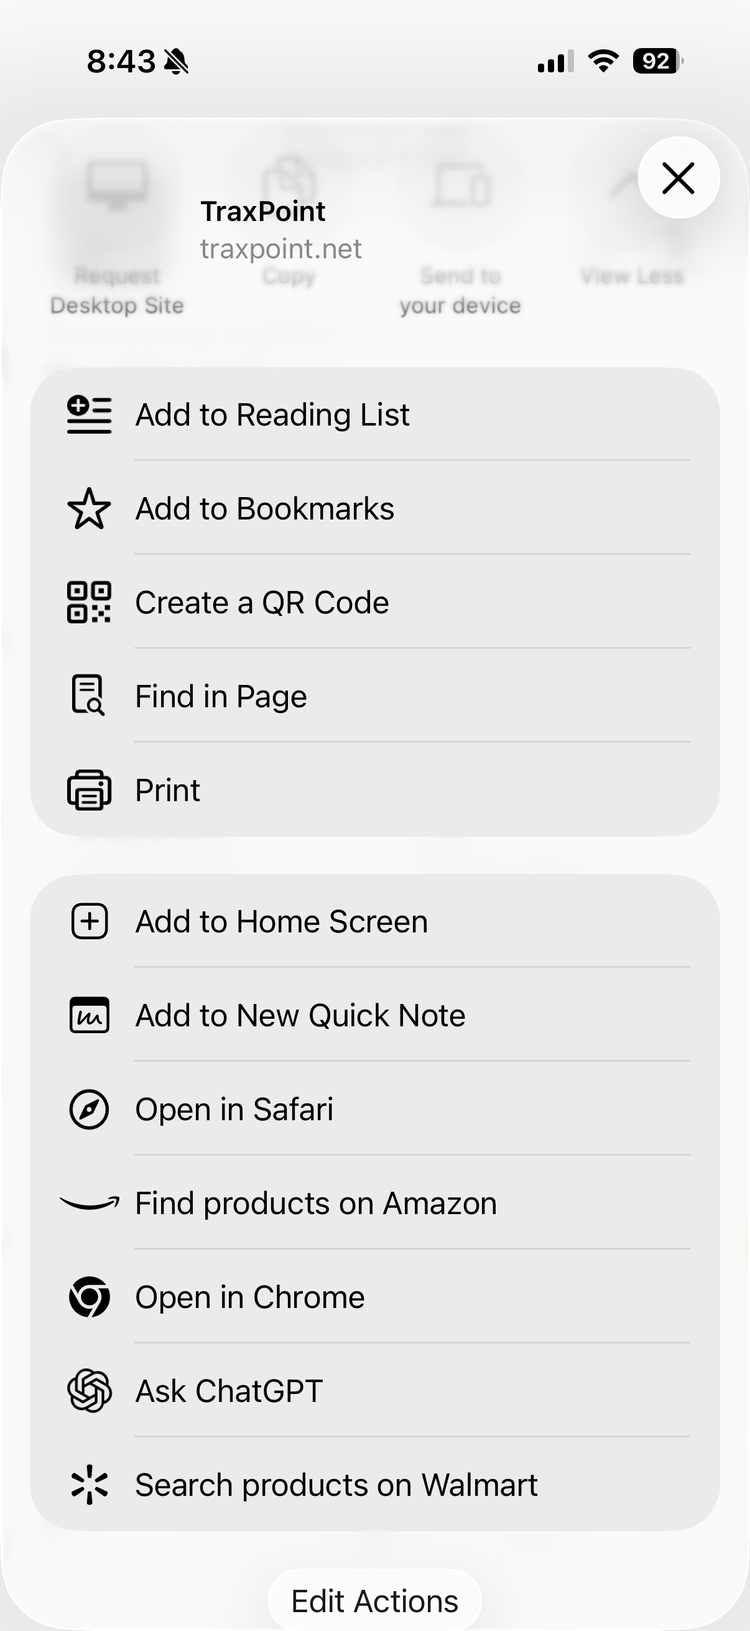
Open the Share menu
Use Safari's Share menu to access installation options.
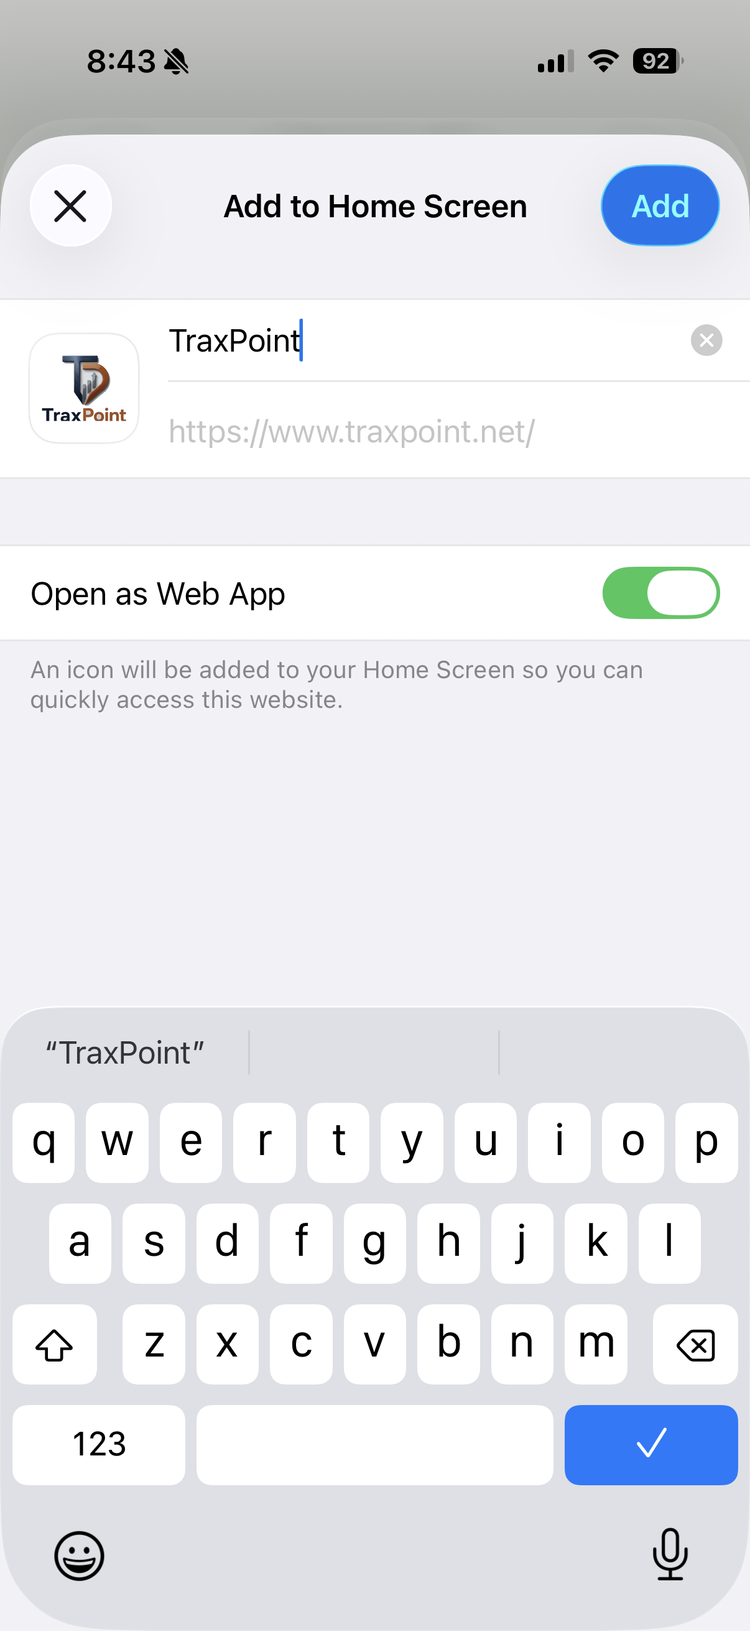
Add to Home Screen
Choose Add to Home Screen and confirm to install the shortcut.
Confirm the system before daily use
Run through these checks before relying on TraxPoint for regular operating decisions.
Keep Inventory current, review costs, maintain Recipes, import PMIX consistently, and investigate exceptions before they become larger problems.
Fix the common issues first
If an import or record does not behave as expected, start with the smallest affected item before making a larger change.
My spreadsheet file is rejected.
Use the official TraxPoint template. Confirm the worksheet name and column headers have not been changed.
A row says a required field is missing.
Complete every required field shown in the preview, then upload the corrected file again.
A SKU or code already exists.
Search for the existing record and update it instead of creating another record with the same identifier.
TraxPoint cannot find the location.
Use the exact location name or location code shown inside TraxPoint and confirm your account has access to that location.
Some rows imported and others did not.
Review the rejected-row messages, correct only those rows, and upload the corrected file again.
My item cost looks too high or too low.
Confirm Cost Per Unit matches the primary unit and review case, pack, and unit conversion fields.
A Recipe cost looks unreasonable.
Review ingredient quantities, ingredient units, Inventory costs, and the Recipe yield or serving count.
Low Stock is not showing as expected.
Confirm Current Stock and Reorder Point for the selected location.
Include a screenshot, the affected SKU or code, the location, the screen name, the exact error message, and the steps that produced it.
Your foundation is built. Start using TraxPoint.
Keep Inventory current, maintain your costs and Recipes, review exceptions, and use TraxPoint as part of your regular operating workflow.